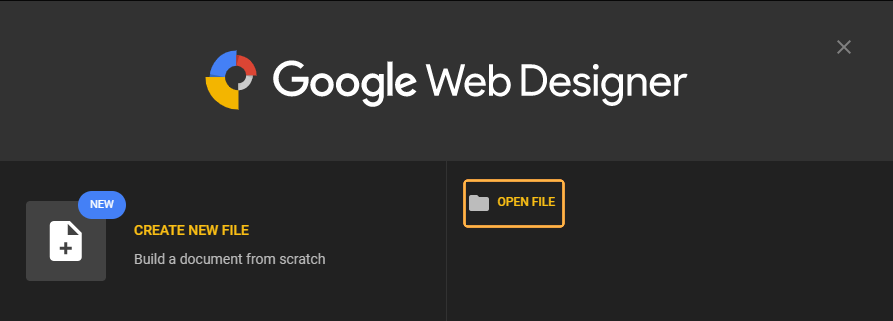
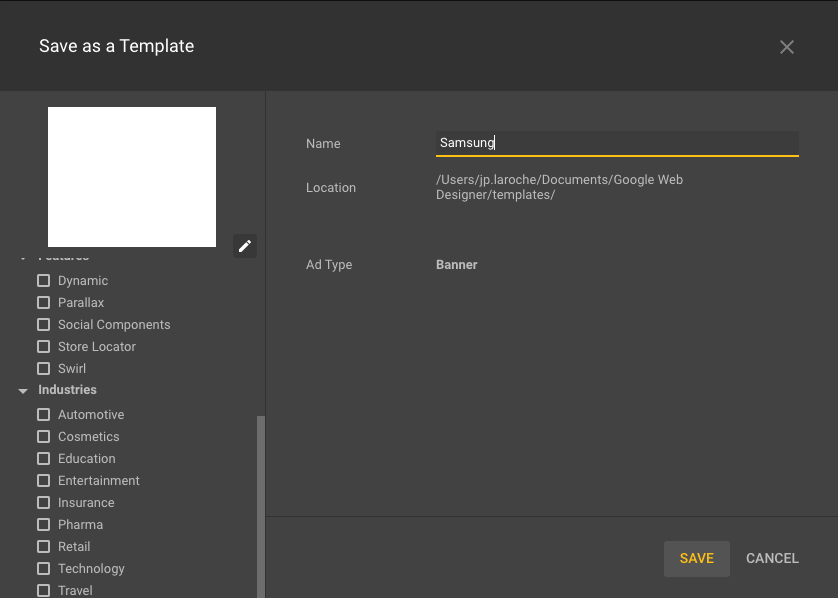
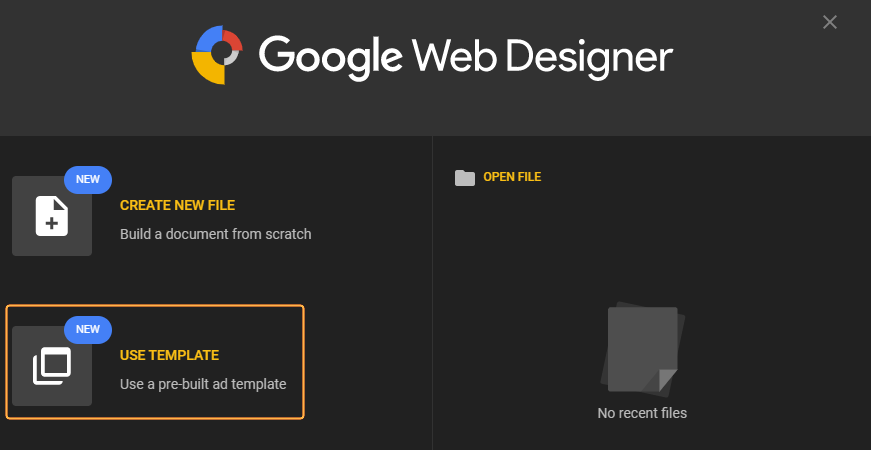
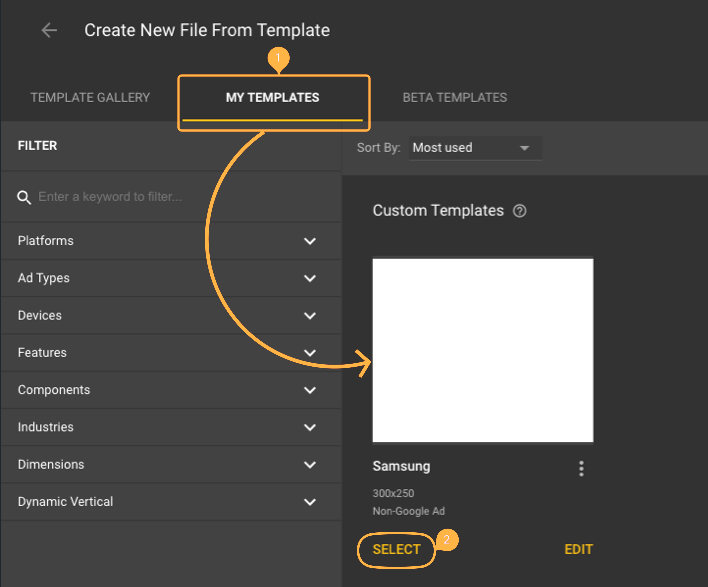
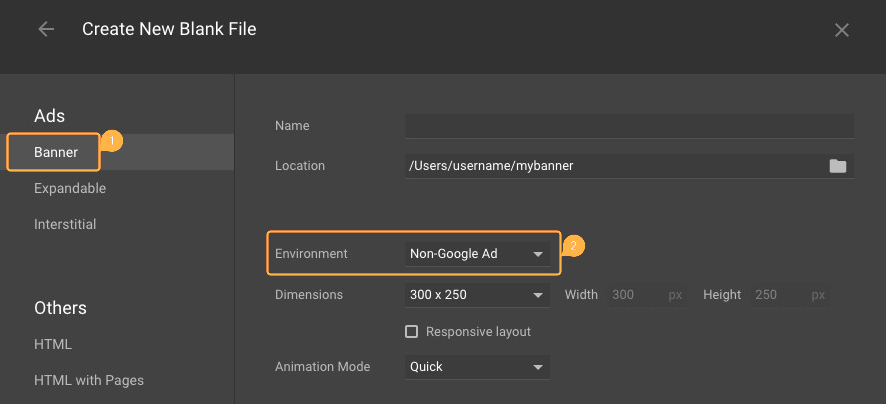
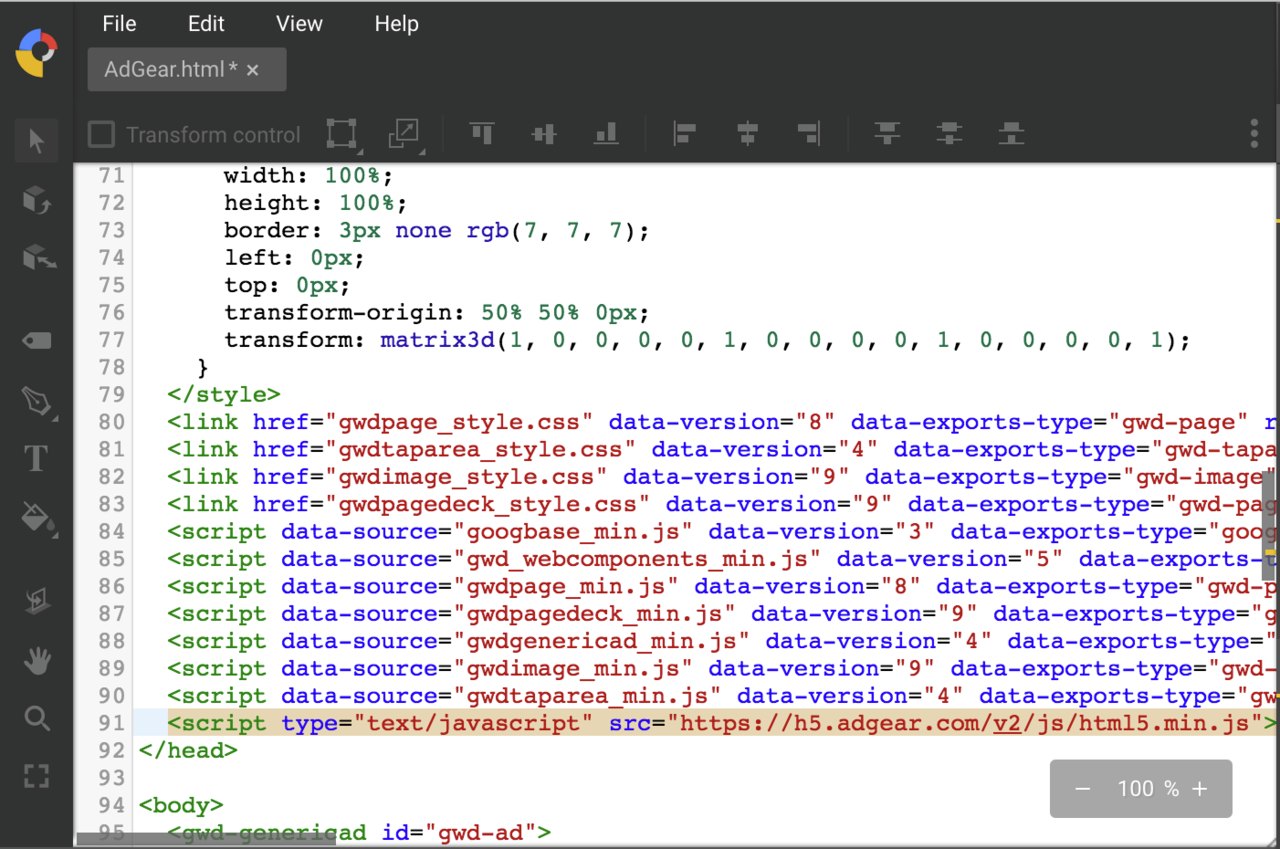
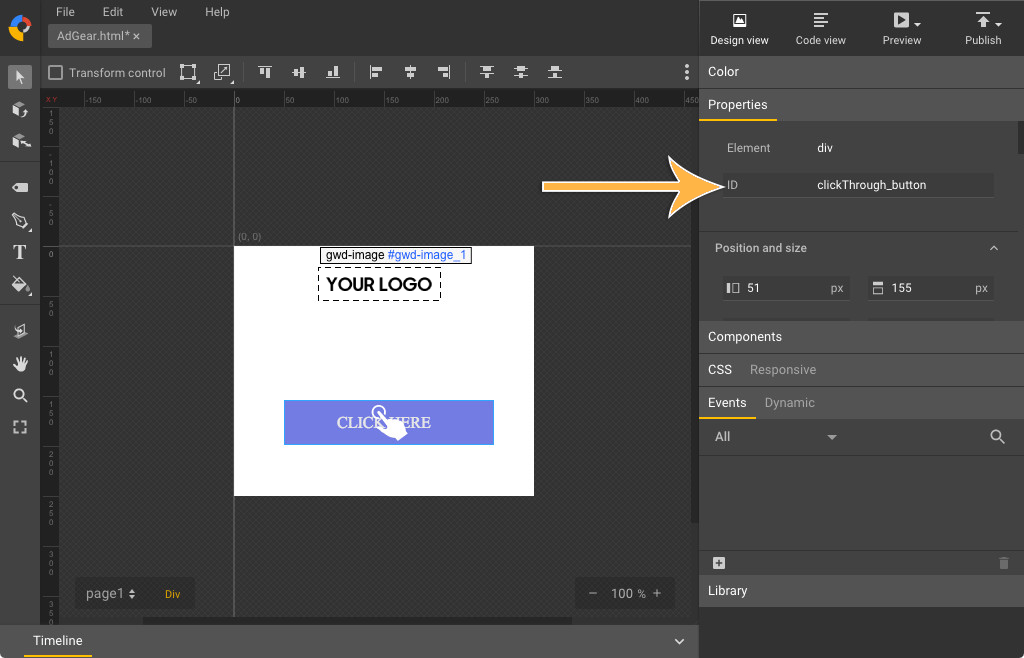
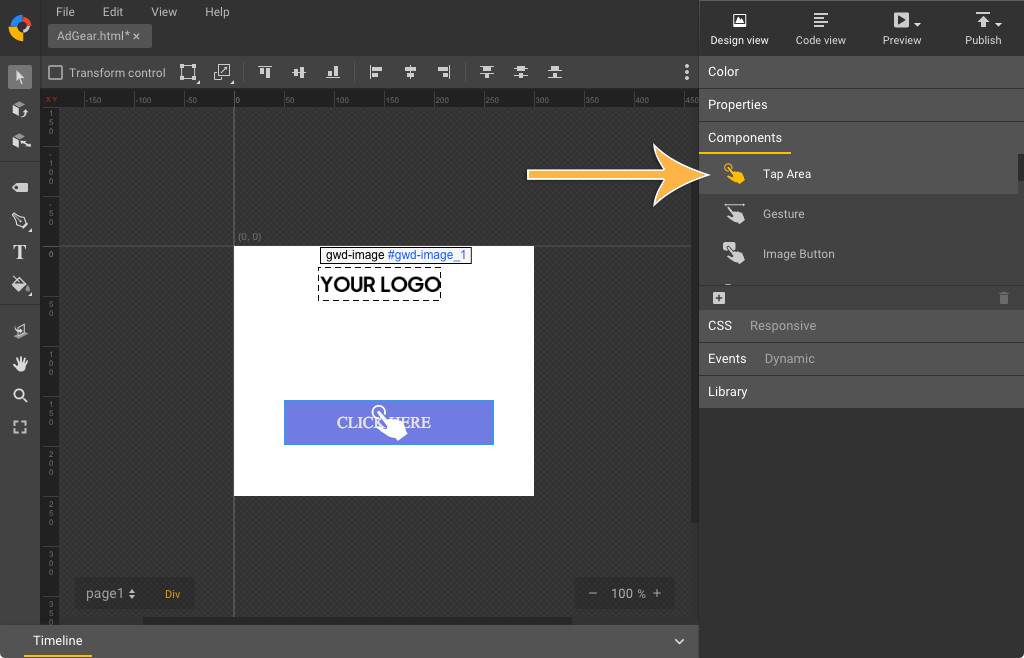
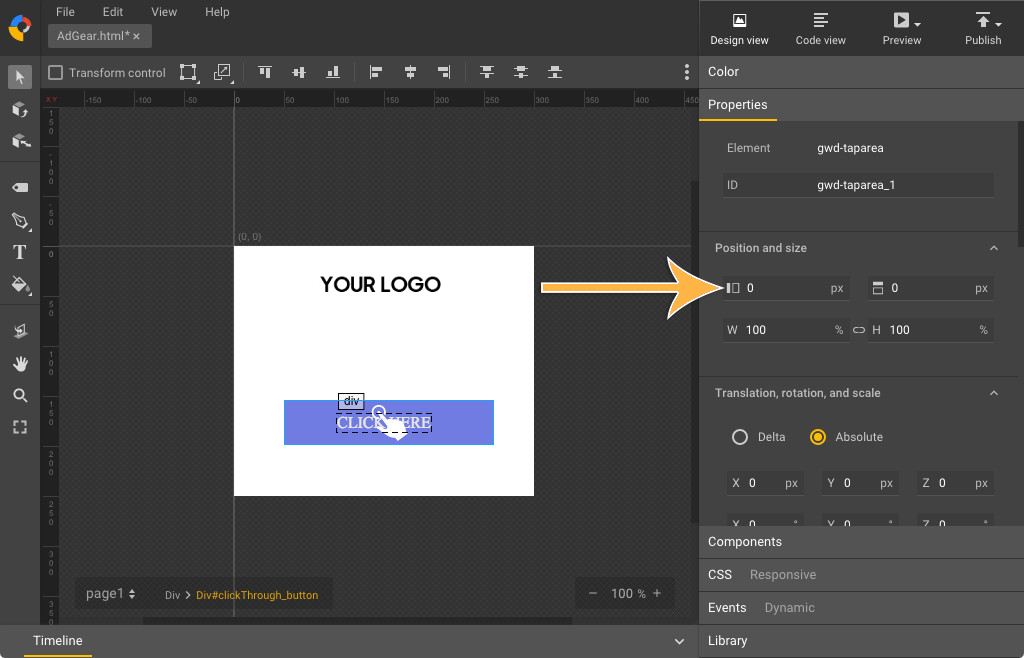
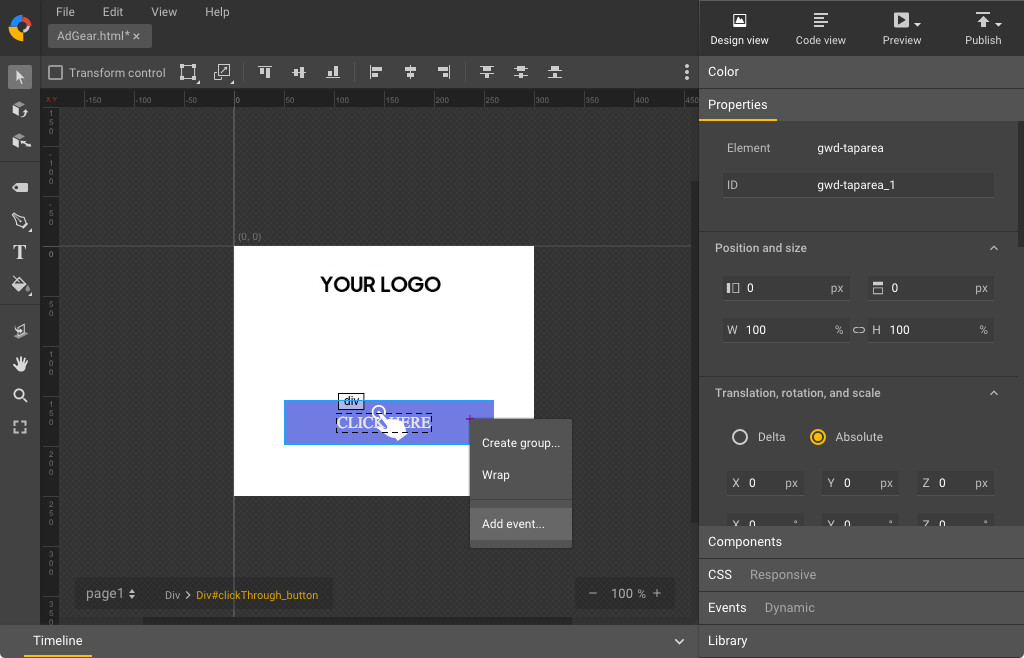
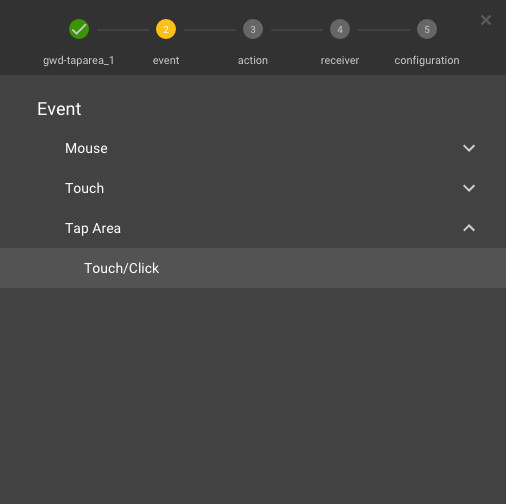
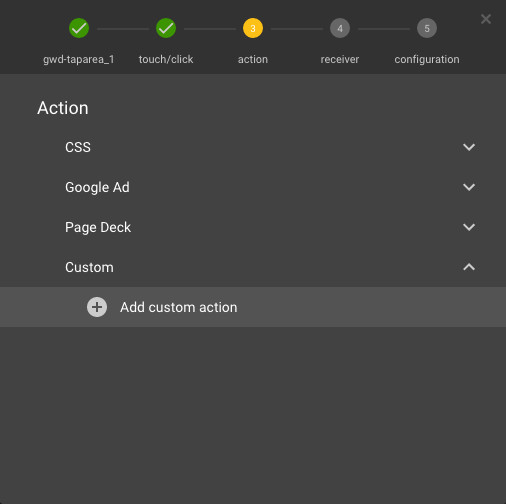
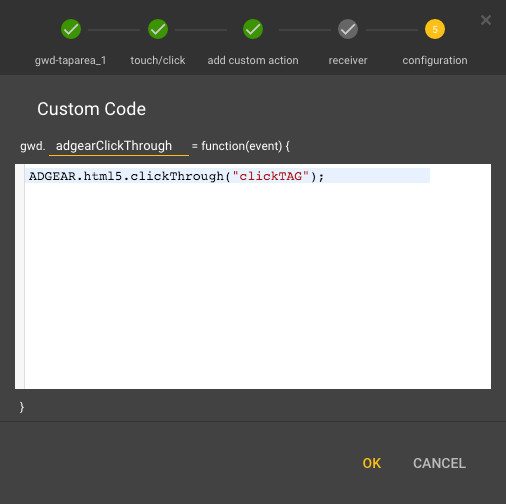
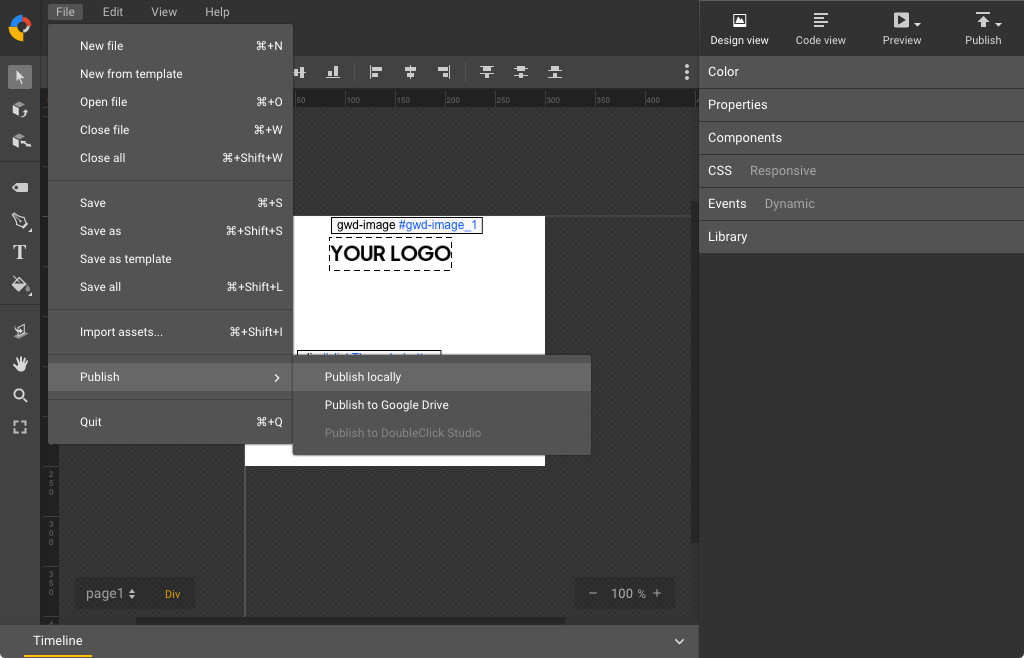
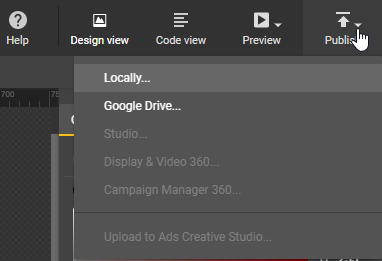
--- title: "Building HTML5 with Google Web Designer" slug: "building-html5-with-google-web-designer" updated: 2024-06-07T13:55:18Z published: 2024-06-07T13:55:18Z canonical: "help.dsp.samsungads.com/building-html5-with-google-web-designer" --- > ## Documentation Index > Fetch the complete documentation index at: https://help.dsp.samsungads.com/llms.txt > Use this file to discover all available pages before exploring further. # Building HTML5 with Google Web Designer This page helps you build an HTML5 creative using [Google Web Designer](https://webdesigner.withgoogle.com/). ## New Ad from Template 1. Download the [adgear_html5_gwd_template.html](https://cdn.document360.io/287afab9-a086-4024-a782-6cbdb167f005/Images/Documentation/adgear_html5_gwd_template.html?sv=2026-02-06&spr=https&st=2026-11-10T16%3A35%3A03Z&se=2026-11-10T17%3A35%3A03Z&sr=c&sp=r&sig=YTNVd5s1IlahuybIuvK8ItSRhcjxSWl8db8LJAWZlsU%3D) file. 2. In Google Web Designer, click **Open File** to open the HTML file. ![](https://cdn.document360.io/287afab9-a086-4024-a782-6cbdb167f005/Images/Documentation/image-1687928797887.png?sv=2026-02-06&spr=https&st=2026-11-10T16%3A35%3A03Z&se=2026-11-10T17%3A35%3A03Z&sr=c&sp=r&sig=YTNVd5s1IlahuybIuvK8ItSRhcjxSWl8db8LJAWZlsU%3D) 3. Use the **Save as template** option so that you can re-use that template later. ![](https://cdn.document360.io/287afab9-a086-4024-a782-6cbdb167f005/Images/Documentation/image-1687928818976.png?sv=2026-02-06&spr=https&st=2026-11-10T16%3A35%3A03Z&se=2026-11-10T17%3A35%3A03Z&sr=c&sp=r&sig=YTNVd5s1IlahuybIuvK8ItSRhcjxSWl8db8LJAWZlsU%3D) 4. Once the template is imported, click **Use Template**. ![](https://cdn.document360.io/287afab9-a086-4024-a782-6cbdb167f005/Images/Documentation/image-1687928868018.png?sv=2026-02-06&spr=https&st=2026-11-10T16%3A35%3A03Z&se=2026-11-10T17%3A35%3A03Z&sr=c&sp=r&sig=YTNVd5s1IlahuybIuvK8ItSRhcjxSWl8db8LJAWZlsU%3D) 5. Click **My Templates** and select the template you created ![](https://cdn.document360.io/287afab9-a086-4024-a782-6cbdb167f005/Images/Documentation/image-1687928883993.png?sv=2026-02-06&spr=https&st=2026-11-10T16%3A35%3A03Z&se=2026-11-10T17%3A35%3A03Z&sr=c&sp=r&sig=YTNVd5s1IlahuybIuvK8ItSRhcjxSWl8db8LJAWZlsU%3D) 6. Jump to the [Click Button](/docs/building-html5-with-google-web-designer#click-button) section to create your click button. ## New Ad (From scratch) When building a new file, you can select **Banner**, under Ads. For the environment, make sure to select **Non-Google Ad** . ![](https://cdn.document360.io/287afab9-a086-4024-a782-6cbdb167f005/Images/Documentation/image-1687928992430.png?sv=2026-02-06&spr=https&st=2026-11-10T16%3A35%3A03Z&se=2026-11-10T17%3A35%3A03Z&sr=c&sp=r&sig=YTNVd5s1IlahuybIuvK8ItSRhcjxSWl8db8LJAWZlsU%3D) ## Add the AdGear HTML5 API 1. To add the reference to AdGear HTML5 API JavaScript file, click the **Code View** button, next to the **Design View** button. 2. From the code view, find the closing tag and just before that tag, add the AdGear HTML5 API JavaScript. ![](https://cdn.document360.io/287afab9-a086-4024-a782-6cbdb167f005/Images/Documentation/image-1687929068264.png?sv=2026-02-06&spr=https&st=2026-11-10T16%3A35%3A03Z&se=2026-11-10T17%3A35%3A03Z&sr=c&sp=r&sig=YTNVd5s1IlahuybIuvK8ItSRhcjxSWl8db8LJAWZlsU%3D) **Code Snippet** ``` ``` ## Click Button Make sure you are on the Design view. 1. Use the **Element tool** to create a rectangle. ![](https://cdn.document360.io/287afab9-a086-4024-a782-6cbdb167f005/Images/Documentation/image-1687929393820.png?sv=2026-02-06&spr=https&st=2026-11-10T16%3A35%3A03Z&se=2026-11-10T17%3A35%3A03Z&sr=c&sp=r&sig=YTNVd5s1IlahuybIuvK8ItSRhcjxSWl8db8LJAWZlsU%3D) 2. Select your click button on the scene with the **Selection** tool. ![](https://cdn.document360.io/287afab9-a086-4024-a782-6cbdb167f005/Images/Documentation/image-1687929385562.png?sv=2026-02-06&spr=https&st=2026-11-10T16%3A35%3A03Z&se=2026-11-10T17%3A35%3A03Z&sr=c&sp=r&sig=YTNVd5s1IlahuybIuvK8ItSRhcjxSWl8db8LJAWZlsU%3D) 3. Set an ID to this element, in the **Properties** section of the right panel. ![](https://cdn.document360.io/287afab9-a086-4024-a782-6cbdb167f005/Images/Documentation/image-1687929405574.png?sv=2026-02-06&spr=https&st=2026-11-10T16%3A35%3A03Z&se=2026-11-10T17%3A35%3A03Z&sr=c&sp=r&sig=YTNVd5s1IlahuybIuvK8ItSRhcjxSWl8db8LJAWZlsU%3D) 4. Double-click your element. 5. On the right panel, click **Components**. 6. Drag the **Tap Area** component to the scene. ![](https://cdn.document360.io/287afab9-a086-4024-a782-6cbdb167f005/Images/Documentation/image-1687929423099.png?sv=2026-02-06&spr=https&st=2026-11-10T16%3A35%3A03Z&se=2026-11-10T17%3A35%3A03Z&sr=c&sp=r&sig=YTNVd5s1IlahuybIuvK8ItSRhcjxSWl8db8LJAWZlsU%3D) 7. On the right panel, click **Properties**. 8. Edit the top and left to **0px**, and the width and height to **100%** (click px and change it for %). ![](https://cdn.document360.io/287afab9-a086-4024-a782-6cbdb167f005/Images/Documentation/image-1687929462092.png?sv=2026-02-06&spr=https&st=2026-11-10T16%3A35%3A03Z&se=2026-11-10T17%3A35%3A03Z&sr=c&sp=r&sig=YTNVd5s1IlahuybIuvK8ItSRhcjxSWl8db8LJAWZlsU%3D) 9. Right-click your element on the scene and click **Add event...** ![](https://cdn.document360.io/287afab9-a086-4024-a782-6cbdb167f005/Images/Documentation/image-1687930334657.png?sv=2026-02-06&spr=https&st=2026-11-10T16%3A35%3A03Z&se=2026-11-10T17%3A35%3A03Z&sr=c&sp=r&sig=YTNVd5s1IlahuybIuvK8ItSRhcjxSWl8db8LJAWZlsU%3D) 10. In the **Event** panel, click **Tap Area** and select **Touch/Click.** ![](https://cdn.document360.io/287afab9-a086-4024-a782-6cbdb167f005/Images/Documentation/image-1687929545583.png?sv=2026-02-06&spr=https&st=2026-11-10T16%3A35%3A03Z&se=2026-11-10T17%3A35%3A03Z&sr=c&sp=r&sig=YTNVd5s1IlahuybIuvK8ItSRhcjxSWl8db8LJAWZlsU%3D) 11. In the **Action** panel, click **Custom** and select **Add custom action**. ![](https://cdn.document360.io/287afab9-a086-4024-a782-6cbdb167f005/Images/Documentation/image-1687958051286.png?sv=2026-02-06&spr=https&st=2026-11-10T16%3A35%3A03Z&se=2026-11-10T17%3A35%3A03Z&sr=c&sp=r&sig=YTNVd5s1IlahuybIuvK8ItSRhcjxSWl8db8LJAWZlsU%3D) 12. Give a name to the custom action. In our example, we'll use *adgearClickThrough*. 13. In the code section, add the call to the AdGear’s `clickThrough`function with `clickTAG` as the click name, and click **OK**. ![](https://cdn.document360.io/287afab9-a086-4024-a782-6cbdb167f005/Images/Documentation/image-1687929557837.png?sv=2026-02-06&spr=https&st=2026-11-10T16%3A35%3A03Z&se=2026-11-10T17%3A35%3A03Z&sr=c&sp=r&sig=YTNVd5s1IlahuybIuvK8ItSRhcjxSWl8db8LJAWZlsU%3D) **Code Snipet** ``` ADGEAR.html5.clickThrough("clickTAG") ``` ## Complete the code See [HTML5 Javascript Library](/v1/docs/html5-javascript-library) to create more sophisticated ad executions by leveraging the extent of the AdGear HTML5 JavaScript API. Please consider having a look at this document [HTML5 Recommendations](/v1/docs/html5-recommendations) where we provide important tips and best practices to improve your HTML5. ## Publish 1. Go to **File**, click **Publish** and select **Publish locally**. ![](https://cdn.document360.io/287afab9-a086-4024-a782-6cbdb167f005/Images/Documentation/image-1687929893636.png?sv=2026-02-06&spr=https&st=2026-11-10T16%3A35%3A03Z&se=2026-11-10T17%3A35%3A03Z&sr=c&sp=r&sig=YTNVd5s1IlahuybIuvK8ItSRhcjxSWl8db8LJAWZlsU%3D) 1. Alternatively, click the **Publish** icon on the top right of the screen and select **Publish locally**. ![](https://cdn.document360.io/287afab9-a086-4024-a782-6cbdb167f005/Images/Documentation/image-1687929909777.png?sv=2026-02-06&spr=https&st=2026-11-10T16%3A35%3A03Z&se=2026-11-10T17%3A35%3A03Z&sr=c&sp=r&sig=YTNVd5s1IlahuybIuvK8ItSRhcjxSWl8db8LJAWZlsU%3D) 2. In the **Publish** settings, we suggest that you check the **Create Zip** option, as Samsung DSP requires the package to be a zip file. 3. We also recommend that you check the Minify option, to minimize the total file size of the ad. For the other options, select the ones that fit your needs. ## Other Google Web Designer Tutorials - [Integrate a YouTube video component with Google Web Designer](/v1/docs/integrate-a-youtube-video-component-with-google-web-designer) - [Convert a Doubleclick, AdWords or AdMob ad to Non-Google ad](/v1/docs/convert-a-doubleclick-adwords-or-admob-ad-to-non-google-ad) - [Integrate a video with Google Web Designer](/v1/docs/integrate-a-video-with-google-web-designer)