---
title: "Flight Inventory"
slug: "flight-marketplace"
updated: 2025-03-29T00:47:22Z
published: 2025-03-29T00:47:22Z
canonical: "help.dsp.samsungads.com/flight-marketplace"
---
> ## Documentation Index
> Fetch the complete documentation index at: https://help.dsp.samsungads.com/llms.txt
> Use this file to discover all available pages before exploring further.
# Flight Inventory
Update on New Flight form
Samsung is rolling out a new and streamlined New Flight form. At this time, you are able to use either version of the form. Learn how to switch between versions [here](/docs/set-up-a-flight).
Please note: In the older version of the **New Flight form**, the **Inventory** function is located in the **Marketplace** tab.
This section of the New Flight form lists all the deals you have access to, including those you imported from the **[Marketplace](/docs/marketplace)** page. It serves as a bridge to easily link deals with your flights.
#### Deal auction types
There are three deal option types:
- **Fixed**: You pay exactly the fixed amount of the deal.
- **First Bid/Price**: You pay exactly what you bid.
- **Second Bid/Price** (you pay $0.01 above the second highest bid in the auction)
The **First Bid/Price** and **Second Bid/Price** will usually have also a **Floor Price**, meaning if you bid below that **Floor Price**, your bid will be ignored by the exchange. **Floor Price** refers to the lowest price from which the publisher agrees to sell their inventory.
You can use the search box to filter by Deal Type, Auction Type, Exchange, etc.
## Deal Types
You can bid on the following types of deals with Samsung DSP:
- [Direct Deals](/docs/flight-marketplace#direct-deals)
- [Open Market](/docs/flight-marketplace#open-market)
- [Programmatic Guaranteed](/docs/flight-marketplace#programmatic-guaranteed)
You can select items from **Direct Deals** and **Open Market** on the same flight, but we usually suggest creating a different flight per type for better bid amount management.
- Use the search box to find or filter deals based on the available values (ID, State, Deal Type, Exchange, Channels, Country, etc.)
- You can select several deals and create a **Preset** that will be saved as a template. See [Presets](/docs/flight-marketplace#presets) for more information.
### Direct Deals
**Direct Deals** are special buyer agreements with sellers, allowing for access to preferential pricing, exclusive inventory, or both.
This section is composed of two tabs: **Featured** and **Others**.
| Featured | Others |
| --- | --- |
| The **Featured** tab lists all deals from Samsung Ads that target exclusively TV Plus inventory (Connected TV). You can take benefit from a refined and curated selection of inventory relevant to your marketing objective. The **Featured** tab appears only if you have selected **Connected TV (CTV)** in the *Inventory Source* page when configuring your flight. If this tab is not available to you and you wish to add this feature, please contact your account manager, i.e. the admin. You can edit this selection by clicking **Selected** and untick checkboxes. | The **Others** tab gathers deals that were not marked as **Featured Deal** when imported by Samsung Ads Admins. If the featured tab is not available to you, all the deals will be listed under the **All** tab. |
You can create a preset that combines deals from both the **Featured** and **Others** tabs. If the preset includes deals only from the **Others** tab, they will only be accessible from the **Selected** button under that tab. The same applies if the preset includes deals only from the **Featured** tab. However, if the preset includes a mix of deals from both tabs, the deals will appear under the respective **Selected** button of the deal category they belong to (**Featured** or **Others**). See [Presets](/docs/flight-marketplace#presets) for more information. A tooltip with the total number of deals selected from both sections (**Featured** and **Others**) is displayed above.
### Open Market
**Open Market** shows all exchanges and sellers Samsung DSP has access to on the open market. By default, no sellers are selected. 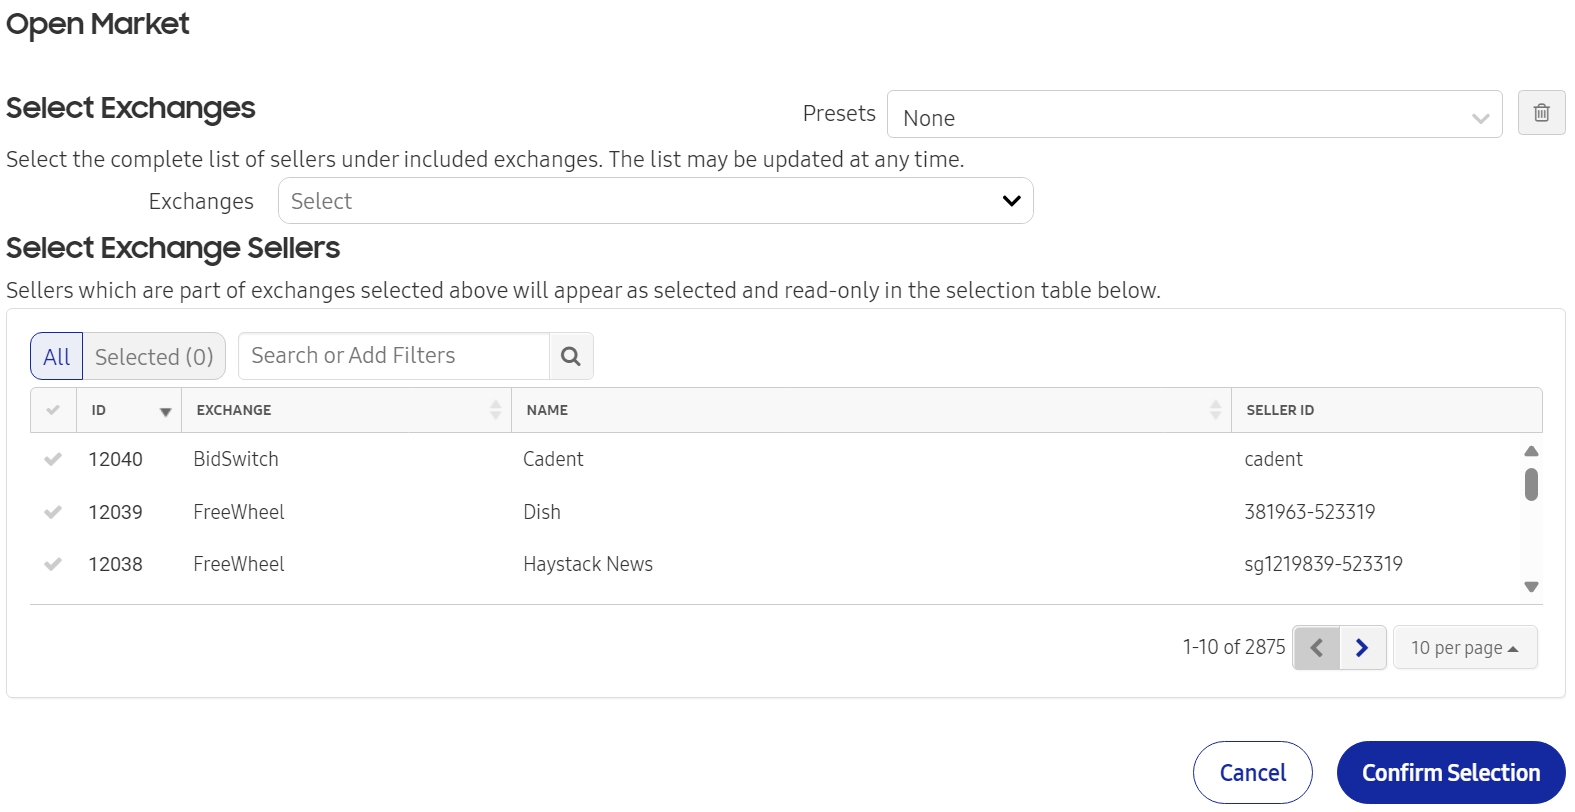
On this page, you have the possibility to customize your selection of sellers from various exchanges.
This page is composed of two sections, **Select Exchanges** and **Select Exchange Sellers**, that were designed to cater to different use cases and provide you with the flexibility and control you need to tailor your selection of sellers.
Use Case 1: Targeting all Sellers from exchange(s) If your intention is to target all sellers from specific exchange(s):
1. Click the **Exchanges** drop-down list under **Select Exchanges**.
2. Select the desired exchange(s) by ticking the corresponding checkbox(es).
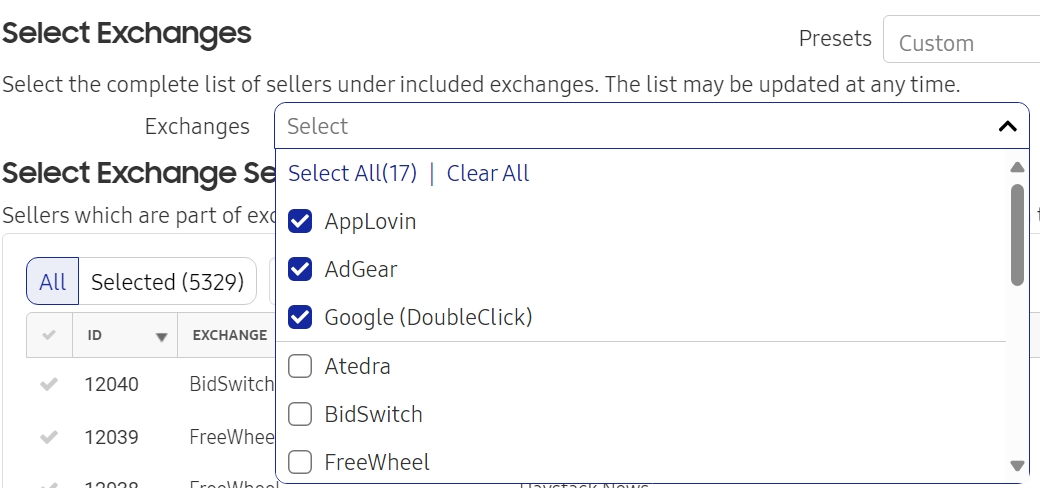
Use Case 2: Targeting some sellers from exchanges(s) If you prefer to target only specific sellers from particular exchange(s), you can use the **Search or Add Filters** field. Here's how:
1. Click on **Search or Add Filters**, then **Exchange**.
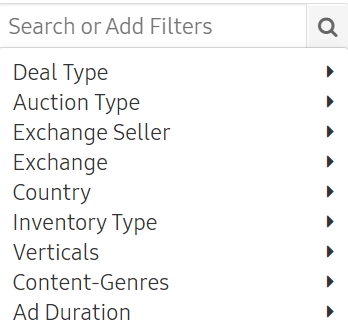
1. Tick the checkbox(es) of the exchange(s) you wish to filter. Alternatively, you can also type the exchange name directly into the field for quicker selection.
2. In the list, click **the checkmark** to include the desired seller(s) in your selection.
Sellers that you picked in the **Exchange Sellers** section won't be removed if you decide to clear up your selection in the **Exchanges** drop-down list. For example, let's say you select *Google DoubleClick* in the **Exchanges** drop-down then select 5 sellers from *FreeWheel* in the **Exchange Sellers** section. If you untick *Google DoubleClick* in the **Exchange** drop-down list, it will not remove your selection of the 5 *FreeWheel* sellers in the **Exchange Sellers** section.
Use Case 3: Combination of use case 1&2 For those who wish to target all sellers from specific exchange(s) while also targeting specific sellers from other exchange(s), you can combine the procedures described in Use Case 1 and Use Case 2.
---
### Programmatic Guaranteed
**Programmatic Guaranteed (PG)** deals grant buyers access to exclusive offers from publishers. The publishers commit to delivering a certain amount of inventory/impressions based on a fixed price, with the proviso that buyers agree to pay for a predetermined number of impressions.
Some considerations to take into account about the Programmatic Guaranteed deals:
- If selected in the *Budget Allocation* type for a *Campaign*, other deal types (Open market, Direct Deals) will be disabled.
- Only one flight can be assigned to the campaign using the Programmatic Guaranteed deal.
- Only one Programmatic Guaranteed deal can be selected per flight.
- The Programmatic Guaranteed deal you select and save won’t be available for other campaigns.
## Presets
 Presets group together a collection of frequently used items.
This saves you a significant amount of time and effort, as you can quickly access all the items you need in one place.
Use presets to personalize your workflow, giving it a tailored approach and enhancing productivity along the way.
Note
The changes you apply to the presets in the Marketplace will be automatically reflected in the presets you have previously selected in the Flight Marketplace tab.
Important
Some considerations to take into account:
- A preset cannot contain multiple Programmatic Guaranteed deals, as only one per flight is allowed.
- An error will occur if you try to create a preset combining a Programmatic Guaranteed deal with another deal type.
- Only presets for Private Marketplace (i.e., Direct Deals) can be created and managed from the Marketplace page.
- For Open Market deals, please create and manage your presets from the Flight Marketplace page.
### Create a pre-set
1. Click the checkbox to select the deals you want to include in the preset.
2. Once your selection is complete, click the **Floppy Disk** icon to save your preset.
3. In the pop-up window, enter a name for this preset and click **Save Preset**.
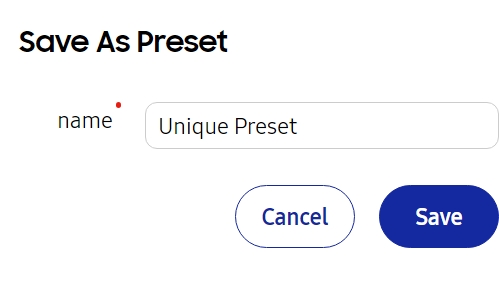
1. Your preset will appear in the Presets drop-down list.
### Rename a preset
1. In the Presets drop-down list, select a preset.
2. Click the **pencil icon** to edit the selected preset.
3. Change the name and click **Rename Preset** to confirm.
### Delete an existing preset
1. In the Presets drop-down list, select a preset.
2. Click the **pencil icon** to edit the selected preset
3. In the pop-up window, click **Delete Presets**.
4. Click **Delete** to confirm.
### Edit an existing preset
1. In the Presets drop-down list, select a preset.
2. Add or remove deals from the list by clicking on the checkboxes.
3. Click the **floppy disk icon** to save your changes.
4. From here, you can either update the current preset by selecting Update Existing OR create a new preset from this one that will include your changes by clicking **Save as New**.
5. Select the flight(s) by using the checkbox and click 6. Update Flights to reflect your changes. By default, all flights are ticked.
6. Click **Skip** if you just want to update the preset without applying the changes to affected flight(s).
Note
If the preset is already applied, the updates will be reflected wherever the preset is used.